Egg and Sperm
Amigurumi ·I made this little project to be a Valentine’s Day gag. Basically, I saw this and this for sale and decided that I wanted them in yarn. And with bigger bows. And to give the sperm a smaller head. And to make the egg’s eyes not pink.
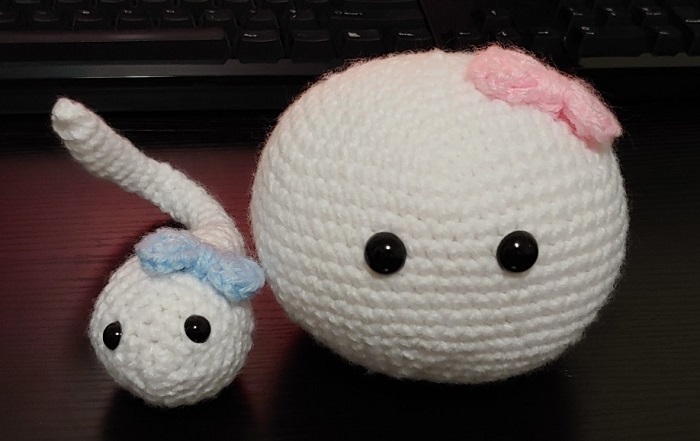
For this pattern, I used worsted weight yarn with a 5mm hook. The egg has 12mm safety eyes and the sperm has 8mm safety eyes. You will also need some pipe cleaners for the sperm if you want its tail to bend. Instructions below use American crochet terminology and abbreviations.
Egg
- Rnd 1: 6 sc in magic ring (6)
- Rnd 2: 6 inc (12)
- Rnd 3: (sc, inc) six times (18)
- Rnd 4: (2 sc, inc) six times (24)
- Rnd 5: (3 sc, inc) six times (30)
- Rnd 6: (4 sc, inc) six times (36)
- Rnd 7: (5 sc, inc) six times (42)
- Rnd 8: (6 sc, inc) six times (48)
- Rnd 9: (7 sc, inc) six times (54)
- Rnd 10: (8 sc, inc) six times (60)
- Rnd 11-19: sc around (60)
- Rnd 20: (8 sc, dec) six times (54)
- Rnd 21: (7 sc, dec) six times (48)
- Rnd 22: (6 sc, dec) six times (42)
- Rnd 23: (5 sc, dec) six times (36)
- Rnd 24: (4 sc, dec) six times (30)
- Rnd 25: (3 sc, dec) six times (24)
Pause crocheting to attach safety eyes and begin stuffing. I attached the eyes between rounds 13 and 14 with four whole stitches between them.
- Rnd 26: (2sc, dec) six times (18)
- Rnd 27: (sc, dec) six times (12)
- Rnd 28: 6 dec (6)
Fasten off.
Sperm
- Rnd 1: 6 sc in magic ring (6)
- Rnd 2: 6 inc (12)
- Rnd 3: (3 sc, inc) three times (15)
- Rnd 4: (4 sc, inc) three times (18)
- Rnd 5: (5 sc, inc) three times (21)
- Rnd 6: (6 sc, inc) three times (24)
- Rnd 7-9: sc around (24)
- Rnd 10: (6 sc, dec) three times (21)
- Rnd 11: (5 sc, dec) three times (18)
- Rnd 12: (4 sc, dec) three times (15)
- Rnd 13: (3 sc, dec) three times (12)
Pause to attach safety eyes and stuff the head. The safety eyes are attached between rounds 3 and 4, with four stitches between them.
- Rnd 14: (4 sc, dec) two times (10)
- Rnd 15-20: sc around (10)
Insert two pipe cleaners and stuff around them.
- Rnd 21: (3 sc, dec) two times (8)
- Rnd 22: (2 sc, dec) two times (6)
- Rnd 23-onwards: sc around (6)
Starting at round 23, you should be crocheting around the two pipe cleaners. The two pipe cleaners should fill up enough empty space so that there shouldn’t be any need to stuff. Continue with sc around until the yarn completely covers the pipe cleaners.
- Final rnd: (sc, dec) two times (4)
Fasten off.
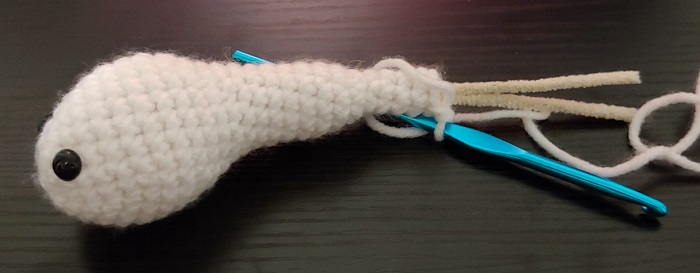
At the very end, you should have a nice, squiggly sperm!

Bows
The bow on the egg uses the pattern from these hair clips. At the very end, just stitch them onto the egg instead of gluing them onto a hair clip.
Pattern for a smaller version for the sperm is below:
- ch 3
- 4 dc in first ch
- ch 3 and sl st into the first chain
- ch 3
- 4 dc in very first ch
- ch 3 and sl st into the first chain
Fasten off and wrap around yarn as detailed on Hello Yellow Yarn.
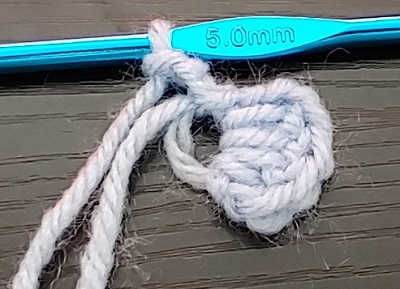
I recommend making the very first chain stitch as large and loose as possible. Try to keep all the dc (sperm bow) and tr (egg bow) for one “half” of the bow on the same side (top or bottom) of the first chain. To get the idea, a half-finished bow is pictured below: